【实验楼】Kafka快速上手教程
kafka 介绍与实践
基本概念
topic: Kafka处理的消�息源
partition: topic物理上的分组,partition中每条消息都会被分配一个有序的id(offset)
message: 消息,通信的基本单位,每个producer可以向一个topic发布一些消息
broker:缓存代理,Kafka集群中的一台或多台服务器统称为broker
leader: 负责处理消息的读和写
replicas: 副本节点
isr: 正在服务中的节点
安装部署
启动hadoop:
$ hadoop/sbin/start-all.sh
启动zookeeper:
$ bin/zookeeper-server-start.sh config/zookeeper.properties &
启动Kafka:
$ bin/kafka-server-start.sh config/server.properties &> /dev/null &
创建topic:
$ bin/kafka-topics.sh --create --zookeeper localhost:2181 --replication-factor 1 --partitions 1 --topic test
列举topic:
$ bin/kafka-topics.sh --list --zookeeper localhost:2181
查看topic信息:
$ bun/kafka-topics.sh --describe --zookeeper localhost:2181 --topic test
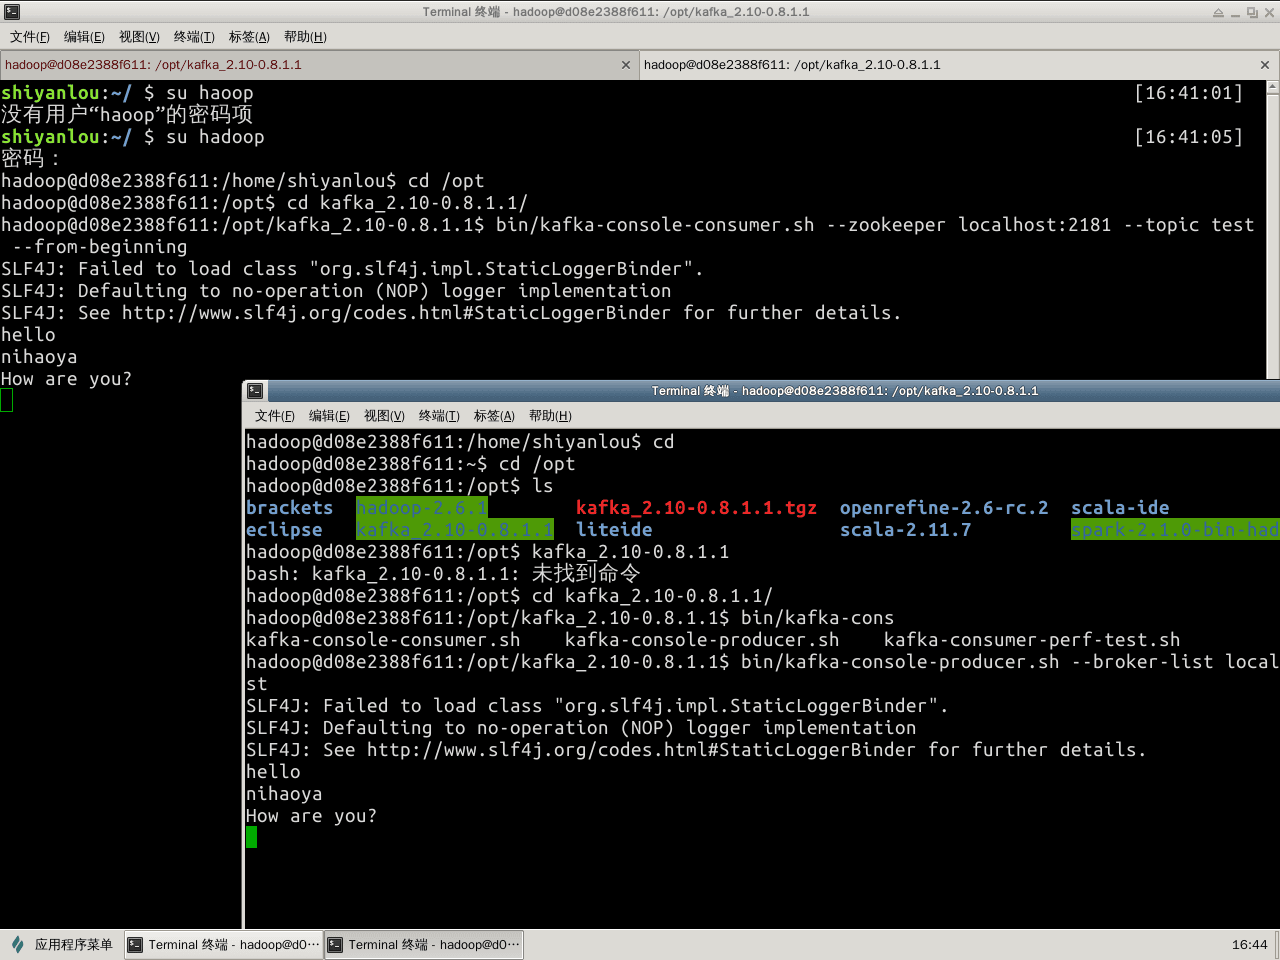
启动producer与consumer:
$ /opt/kafka_2.10-0.8.1.1$  bin/kafka-topics.sh --create --zookeeper localhost:2181 --replication-factor 1 --partitions 1 --topic test
$ /opt/kafka_2.10-0.8.1.1$  bin/kafka-topics.sh --create --zookeeper localhost:2181 --replication-factor 1 --partitions 1 --topic test
多broker配置
准备多broker配置文件:
$ cp config/server.properties  config/server-1.properties
$ cp config/server.properties  config/server-2.properties
指定不同的broker.id、port和log.dir
使用 Java 操作 Kafka
将kafka的libs下的jar包加入build path
Producer代码:
package syl.kafka;

import java.util.*;
import kafka.javaapi.producer.Producer;
import kafka.producer.*;

public class ProducerDemo {
    public static void main(String[] args) throws Exception {
        Properties props = new Properties();

        props.put("zk.connect", "localhost:2181");
        props.put("metadata.broker.list", "localhost:9092");
        props.put("serializer.class", "kafka.serializer.StringEncoder");

        ProducerConfig config = new ProducerConfig(props);
        Producer<String, String> producer = new Producer<>(config);

        for (int i = 1; i <= 100000; i++) {
            producer.send(new KeyedMessage<String, String>("test",
                "message:" + i));
        }
    }
}
Consumer代码:
package syl.kafka;

import java.util.*;
import kafka.consumer.*;
import kafka.javaapi.consumer.*;
import kafka.javaapi.consumer.ConsumerConnector;
import kafka.message.*;

public class ConsumerDemo {

    private static final String topic = "test";
    private static final Integer threds = 1;

    public static void main(String[] args) {
        Properties props = new Properties();
        props.put("zookeeper.connect", "localhost:2181");
        props.put("group.id", "group1");
        props.put("auto.offset.reset", "smallest");

        ConsumerConfig config = new ConsumerConfig(props);
        ConsumerConnector consumer = Consumer.createJavaConsumerConnector(config);
        Map<String, Integer> topicCountMap = new HashMap<>();
        topicCountMap.put(topic, 1);
        Map<String, List<KafkaStream<byte[], byte[]>>> consumerMap = consumer.createMessageStreams(topicCountMap);
        List<KafkaStream<byte[], byte[]>> streams = consumerMap.get(topic);

        for (final KafkaStream<byte[], byte[]> kafkaStream : streams) {
            new Thread(new Runnable() {
                @Override
                public void run() {
                    for (MessageAndMetadata<byte[], byte[]> mm : kafkaStream) {
                        String msg = new String(mm.message());
                        System.out.println(msg);
                    }
                }
            }).start();
        }
    }
}

Kafka 集成 Flume
如果启动zookeeper后运行jps没有QuorumPeerMain,查看zookeeper目录下的zookeeper.out可以找到问题原因。
Kafka Source�
在flume的conf目录下新建一个配置:
$ sudo vi kafkaSource.properties
内容如下:
# Name the components on this agent
a1.sources=r1
a1.channels=c1
a1.sinks=k1

# Describe/configure the source
a1.sources.r1.type=org.apache.flume.source.kafka.KafkaSource
a1.sources.r1.zookeeperConnect=localhost:2181
a1.sources.r1.topic=testkafkasource
a1.sources.r1.groupId=flume
a1.sources.r1.kafka.consumer.timeout.ms=100
a1.sources.source1.interceptors.i1.type = timestamp
# Use a channel which buffers events in memory
a1.channels.c1.type=memory
a1.channels.c1.capacity = 10000
a1.channels.c1.transactionCapacity = 1000
# Describe the sink
a1.sinks.k1.type=hdfs
a1.sinks.k1.hdfs.path=hdfs://localhost:9000/flume-kafa/%{topic}/%y-%m-%d
a1.sinks.k1.hdfs.fileType=DataStream

# Bind the source and sink to the channel
a1.sources.r1.channels=c1
a1.sinks.k1.channel=c1
然后创建topic,使用producer向topic中写入消息,然后flume-ng启动agent:
$ bin/flume-ng agent --conf conf --conf-file conf/kafkaSource.properties --name a1 -Dflume.root.logger=INFO,console
写入消息后,在hdfs上有相应的文件创建。
Kafka Sink
在flume的conf目录下新建一个配置:
$ sudo vi kafkaSink.properties
内容如下:
# Name the components on this agent
a1.sources=r1
a1.channels=c1
a1.sinks=k1

# Describe/configure the source
a1.sources.r1.type=netcat
a1.sources.r1.bind=localhost
a1.sources.r1.port=8888

# Use a channel which buffers events in memory
a1.channels.c1.type=memory

# Describe the sink
a1.sinks.k1.type=org.apache.flume.sink.kafka.KafkaSink
a1.sinks.k1.topic=testkafkasink
a1.sinks.k1.brokerList=localhost:9092
a1.sinks.k1.requiredAcks=1
a1.sinks.k1.batchSize=20

# Bind the source and sink to the channel
a1.sources.r1.channels=c1
a1.sinks.k1.channel=c1
然后创建topic,然后flume-ng启动agent:
$ bin/flume-ng agent --conf conf --conf-file conf/kafkaSink.properties --name a1 -Dflume.root.logger=INFO,console
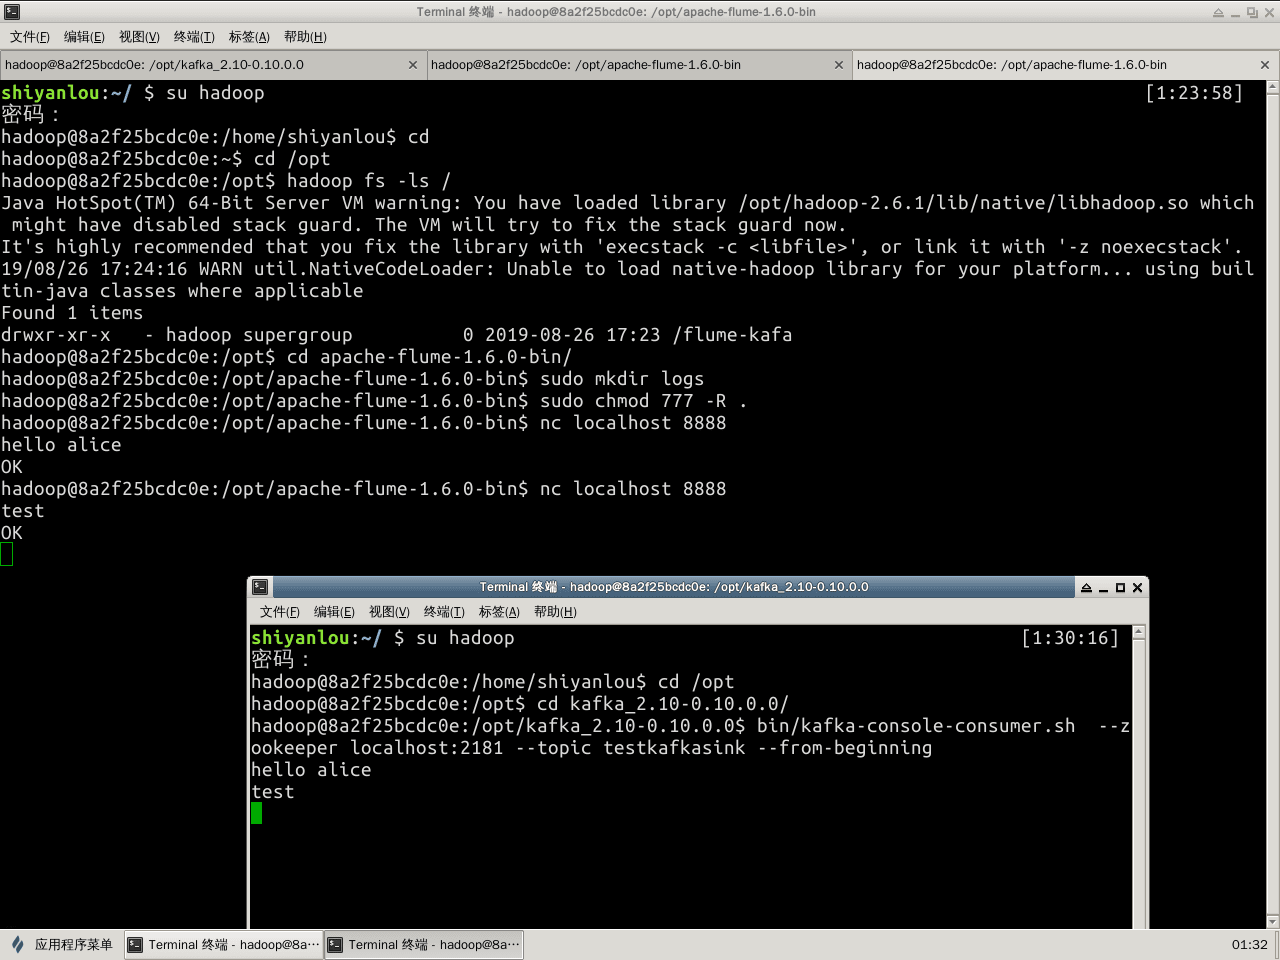
使用nc发送一些数据试验:
$ nc localhost 8888
然后启动consumer,将会消费消息。
Kafka Channel
在flume的conf目录下新建一个配置:
$ sudo vi kafkaChannel.properties
内容如下:
# Name the components on this agent
a1.sources=r1
a1.channels=c1
a1.sinks=k1

# Describe/configure the source
a1.sources.r1.type=netcat
a1.sources.r1.bind=localhost
a1.sources.r1.port=8888

# Describe the channel
a1.channels.c1.type=org.apache.flume.channel.kafka.KafkaChannel
a1.channels.c1.capacity=1000
a1.channels.c1.transactionCapacity=1000
a1.channels.c1.brokerList=localhost:9092
a1.channels.c1.topic=testkafkachannel
a1.channels.c1.zookeeperConnect=localhost:2181

# Describe the sink
a1.sinks.k1.type=hdfs
a1.sinks.k1.hdfs.path=hdfs://localhost:9000/kafka-channel/logs/
a1.sinks.k1.hdfs.filePrefix=log
a1.sinks.k1.hdfs.rollInterval=0
a1.sinks.k1.hdfs.rollCount=10000
a1.sinks.k1.hdfs.fileType=DataStream

# Bind the source and sink to the channel
a1.sources.r1.channels=c1
a1.sinks.k1.channel=c1
然后创建topic,flume-ng启动agent:
$ bin/flume-ng agent --conf conf --conf-file conf/kafkaChannel.properties --name a1 -Dflume.root.logger=INFO,console
使用nc发送一些试验数据,再启动consumer即可消费消息,也能看到hadoop上的内容:
$ hadoop fs -lsr hdfs://localhost:9000/kafka-channel/
区别和联系
Flume是一个专用工具被设计为旨在往HDFS、HBase发送数据,它对HDFS有特殊的优化。
Flume和Kafka可以结合起来使用